
Corn on the cob boiled with milk and butter is the best way to cook fresh sweet corn, it produces kernels that are rich, tender, and naturally buttery without needing anything extra at the table.
This simple three-ingredient corn on the cob recipe transforms a humble summer staple into a side dish that outshines every other cooking method. The total time from pot to plate is just 13 minutes, making it the fastest and most rewarding way to get the most flavor out of fresh summer corn.
| Detail | Info |
|---|---|
| Prep Time | 5 minutes |
| Cook Time | 6–8 minutes |
| Total Time | 13 minutes |
| Servings | 6–8 ears of corn |
| Difficulty | Easy |
| Cuisine | American |
Table of Contents
My absolute go-to method for summer corn is this milk-and-butter boil. I first heard about it from a reader comment a few years back claiming it was the only corn on the cob recipe worth making, I was skeptical at the time, but after the very first batch I made, I never went back. Over the years of making this dozens of times each summer, I have noticed that the key is keeping the heat at a gentle simmer after you add the milk. A hard boil at that stage can cause the milk to foam over and dilute the flavor you are working so hard to build into the corn.
One pro-tip that changed everything for me: use a full stick of salted butter. The salt in the butter seasons the cooking liquid just enough that most people at the table skip the salt shaker entirely. If you are cooking for a crowd and suspect the corn may be a little bland (sometimes late-season corn loses sweetness), add a tablespoon of sugar to the water before adding the milk and butter. That small addition wakes up any corn that needs a little help. The result is a sweet corn on the cob recipe that tastes like it came from a farm stand, even if it came from a grocery bag.
Why This Corn on the Cob Recipe Works Every Time
The science behind boiling corn with milk and butter is straightforward: fat carries flavor. When butter melts into the cooking water, fat-soluble flavor compounds from the corn diffuse into the liquid and then back into the kernels as they cook, creating a feedback loop of richness. Plain water cannot do this. Plain water boils out flavor; this cooking liquid locks it in.
Milk adds another layer by contributing mild lactose sugars and proteins that coat the surface of each kernel as they cook. The result is corn that tastes buttery and slightly sweet before you add a single condiment. I used to reach for a heavy pat of butter the moment corn came off the stove, but with this method I stopped doing that years ago, the corn already has everything it needs.
The timing also matters. Six to eight minutes at a gentle simmer is the sweet spot for fresh summer corn. Shorter and the starch has not fully softened; longer and the kernels start to lose their snap and brightness. If you are cooking from frozen corn on the cob, add two extra minutes to the simmer time. The method adapts well to both, but fresh corn is always the superior choice when it is in season near you. If you enjoy corn-based sides all year, you might also love this creamy corn chowder with potatoes that uses similar sweet-corn flavor principles.
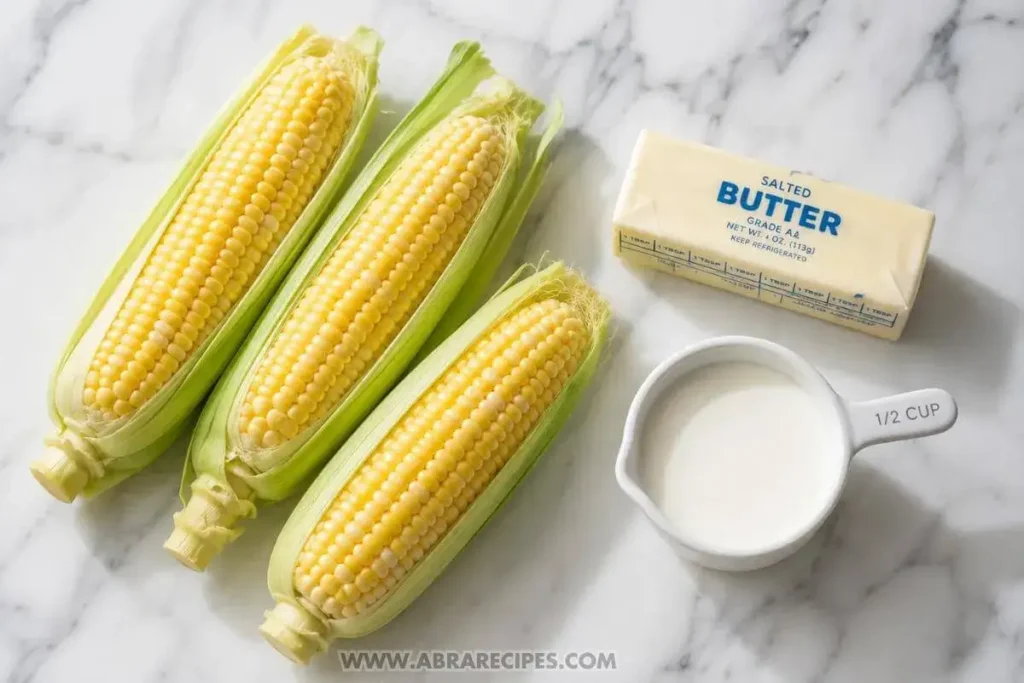
Ingredients for the Best Boiled Corn on the Cob
Three ingredients are all you need. Quality matters most here, the fresher the corn, the better the final result.
| Ingredient | Quantity | Notes / Alternatives |
|---|---|---|
| Fresh ears of corn | 6–8 ears | Husks and silks removed; cut in half for easier serving. Frozen whole ears work but need 2 extra minutes. |
| Whole milk | 1 cup | Whole milk gives the richest result. 2% works fine. Non-dairy oat milk is a viable substitute for a dairy-free version. |
| Butter (salted) | 1 stick (½ cup / 113g) | Salted butter seasons the liquid naturally. Use unsalted if you prefer to control salt separately. Vegan butter works well too. |
| Water | Enough to fill pot halfway | Tap water is fine. No need to salt the water, the butter handles seasoning. |
| Optional: sugar | 1 tablespoon | Add only if corn seems less sweet than usual. Peak-season corn does not need it. |
Mise en Place: Prep Before You Cook
- Pull back the husks from each ear and snap them off cleanly at the base, then discard.
- Remove the silks by hand or use a damp paper towel to wipe any remaining strands off each ear.
- Cut ears in half crosswise if you want shorter, more manageable pieces, a sharp chef’s knife works best here.
- Measure out 1 cup of milk and set it next to the stove.
- Remove the butter stick from the refrigerator and keep it whole, no need to slice it.
- Select your largest pot; all the ears should fit with room to be fully submerged.
How To Make Boiled Corn on the Cob Step-by-Step
Step 1: Bring the Water to a Boil
- Fill a large pot about halfway with cold water.
- Place the pot over high heat and bring to a full rolling boil, this usually takes 8 to 10 minutes depending on your stove.
Step 2: Build the Cooking Liquid
- Pour 1 cup of whole milk directly into the boiling water.
- Add the full stick of butter and stir briefly until it melts into the liquid, about 30 seconds.
Step 3: Cook the Corn
- Lower the prepared ears of corn into the pot using tongs.
- Reduce the heat to medium so the liquid holds a steady, gentle simmer, not a vigorous boil.
- Cook uncovered for 6 to 8 minutes. The kernels are ready when they turn bright golden and feel tender when pierced with a paring knife.
Step 4: Serve
- Lift each ear from the liquid using tongs and transfer to a large serving platter.
- Season lightly with salt and freshly ground black pepper.
- Serve immediately while hot, or leave the corn in the warm liquid with the heat off for up to 15 minutes.
Corn on the Cob Recipe
- Total Time: 13 minutes
- Yield: 6–8 servings 1x
- Diet: Vegetarian
Description
This corn on the cob recipe boiled with milk and butter is the most flavorful, rich, and tender way to cook fresh sweet corn. Ready in just 13 minutes, the milk-and-butter cooking liquid infuses every kernel with a naturally buttery taste so you barely need to add anything at the table.
Ingredients
- 6–8 ears of corn, husks and silks removed, cut in half if desired
- 1 cup whole milk
- 1 stick (½ cup / 113g) butter, salted or unsalted
- Water, enough to fill a large pot halfway
Instructions
- Fill the Pot: Fill a large pot about halfway with water and bring it to a full rolling boil over high heat.
- Add Milk and Butter: Pour in 1 cup of milk and add the full stick of butter. Stir briefly and allow the butter to melt into the liquid.
- Add the Corn: Lower the ears of corn into the pot and reduce the heat to a steady simmer.
- Simmer: Cook the corn, uncovered, for 6 to 8 minutes until the kernels are tender and bright golden.
- Remove and Serve: Lift the corn from the cooking liquid, transfer to a serving platter, and season with salt and pepper to taste. Serve immediately.
Notes
Do not boil the corn at a hard rolling boil after adding the milk – a gentle simmer keeps the kernels tender and prevents the milk from scorching. If the corn is done before the rest of the meal, leave it in the hot liquid with the heat off; it will stay warm for up to 15 minutes. Use salted butter and you may find you need no extra salt at all.
- Prep Time: 5 minutes
- Cook Time: 8 minutes
- Category: Side Dish
- Method: Stovetop / Boiling
- Cuisine: American
Nutrition
- Serving Size: 1 ear of corn (half cob)
- Calories: 110
- Sugar: 6g
- Sodium: 120mg
- Fat: 4g
- Saturated Fat: 2.5g
- Unsaturated Fat: 1.5g
- Trans Fat: 0g
- Carbohydrates: 19g
- Fiber: 2g
- Protein: 3g
- Cholesterol: 10mg
Keywords: corn on the cob, corn on the cob recipe boiled, best boiled corn on the cob, corn on the cob recipe with milk, sweet corn on the cob recipe
Chef Tips for Perfect Corn on the Cob Results
- Choose corn with tight, bright-green husks. Husks that are dry, yellowing, or pulling away from the ear signal older corn that has already begun converting sugars to starch. At a farmers market or roadside stand, look for corn harvested within 24 hours.
- Never salt the water before adding the milk. Salt added early can toughen the skins on the corn kernels. The butter provides enough seasoning for the cooking liquid; add salt only at serving.
- Keep the simmer gentle after adding milk. A hard boil causes the milk to foam aggressively and can scorch on the bottom of the pot. Medium heat that holds a lazy bubble is exactly right.
- Do not overcrowd the pot. The ears should fit in a single layer or be fully submerged. Stacking too many ears above the liquid means uneven cooking. Use two pots for very large batches.
- Test doneness with a paring knife, not time alone. Push the tip into a kernel; it should slide in with almost no resistance and release a small amount of milky liquid. That is the sign of perfectly cooked corn.
- Add sugar only when necessary. Peak-season sweet corn on the cob recipe does not need sugar. Off-season or frozen corn benefits from one tablespoon added to the water before the milk goes in.
Common Mistakes to Avoid When Boiling Corn
| Mistake | Why It Happens | How to Fix It |
|---|---|---|
| Boiling at full heat after adding milk | Impatience or forgetting to reduce heat | The moment the corn goes in, drop the heat to medium. A gentle simmer is all the corn needs to cook through. |
| Overcooking past 8 minutes | Getting distracted or assuming more time means more flavor | Set a timer for 6 minutes and start testing at that point. Overcooked corn turns mushy and loses its snap. |
| Using old corn | Buying corn without checking freshness | Always squeeze the ear through the husk, you should feel firm, tightly packed kernels with no give. Limp corn is too far gone. |
| Skipping the milk and just using water | Not having milk on hand | Even a small amount of milk makes a noticeable difference. Keep a carton in the fridge during corn season specifically for this recipe. |
| Salting the cooking water early | Habit from cooking pasta | Unlike pasta, corn’s kernel skins tighten when salted early. Season at the table instead for better texture. |
Variations and Substitutions
| Ingredient | Substitution | Impact on Flavor |
|---|---|---|
| Whole milk | Oat milk or almond milk | Slightly less rich; oat milk comes closest to dairy in terms of body and mild sweetness. |
| Salted butter | Vegan butter (e.g., Miyoko’s) | Nearly identical result; vegan butter melts and coats kernels the same way. |
| Fresh corn | Frozen whole ears of corn | Slightly less fresh flavor; add 2 extra minutes and start from thawed for best results. |
| Plain seasoning (salt, pepper) | Cajun seasoning blend | Adds heat and smokiness; pairs well if serving alongside grilled meats or Cajun salmon. |
| Butter | Ghee | Nuttier, slightly more complex flavor with a higher smoke point, excellent choice. |
For a Mexican corn on the cob variation (elotes-style), pull the cooked ears from the liquid, brush them with a thin layer of mayonnaise or sour cream, dust with chili powder and smoked paprika, then sprinkle crumbled Cotija cheese over the top. Finish with a squeeze of fresh lime juice.
This is one of the most popular street food preparations in Mexico and it works beautifully with corn cooked in the milk-and-butter method because the kernels are already rich and full of flavor before any topping goes on.
If you prefer a corn on the cob recipe oven method, wrap the prepared ears tightly in foil with a small pat of butter inside each packet and roast at 425°F (220°C) for 25 to 30 minutes. For a corn on the cob recipe air fryer approach, brush husked ears with melted butter and cook at 400°F (200°C) for 10 to 12 minutes, turning halfway through. Both methods produce different texture profiles, the oven method steams the corn inside the foil for a softer bite, while the air fryer gives the kernels a lightly roasted, slightly caramelized edge.
Serving Suggestions and Pairings
This best boiled corn on the cob is the perfect companion to virtually any summer cookout spread. Serve it alongside grilled BBQ chicken for a classic backyard dinner that takes under an hour to pull together. The richness of the corn balances the smoky char of grilled meats without overwhelming any other flavors on the plate.
For a lighter, more casual meal, pair the corn with a cool and creamy side like a classic coleslaw and a big bowl of potato salad. That trio is an unbeatable combination for Fourth of July gatherings, neighborhood block parties, or any casual outdoor occasion. The corn also works well on a weeknight dinner plate next to baked salmon or a simple green salad.
Specific menu ideas by occasion:
- Summer cookout: Grilled chicken thighs, corn on the cob, coleslaw, and watermelon slices.
- Weeknight dinner: Pan-seared salmon, boiled corn on the cob, and a simple cucumber salad.
- Game day spread: BBQ ribs, corn on the cob halves, and baked beans.
- Mexican-style feast: Corn prepared elotes-style with Cotija, chili powder, and lime alongside chicken tacos and fresh salsa.
- Kid-friendly dinner: Corn on the cob halves, beef burgers, and a fruit salad for dessert.
Storage and Reheating
Cooked corn on the cob stores well in the refrigerator for up to three days. Allow the ears to cool completely before wrapping them tightly in plastic wrap or placing them in an airtight container. Do not store corn while it is still warm, trapped steam leads to mushy kernels.
| Method | Duration | How | Ready When |
|---|---|---|---|
| Refrigerator | Up to 3 days | Wrap tightly in plastic wrap or store in airtight container | Kernels still firm and golden; no sour smell |
| Freezer | Up to 3 months | Wrap each ear in plastic, then place in a zip-lock freezer bag | Thaw overnight in refrigerator before reheating |
| Reheat – Microwave | 1–2 minutes | Wrap in a damp paper towel; heat on high 1 minute, check, add 30 seconds if needed | Steam visible when unwrapped; kernels hot throughout |
| Reheat – Stovetop | 3–4 minutes | Drop into simmering water (add a small splash of milk if desired) for 3 minutes | Kernels feel tender when pressed; liquid bubbling gently |
| Reheat – Air Fryer | 4–5 minutes | Brush with melted butter; air fry at 370°F (188°C) | Edges lightly golden; kernels hot to the touch |
Nutritional Information
Approximate values per serving (1 ear of corn, without extra butter added at the table).
| Nutrient | Amount per Serving |
|---|---|
| Calories | 110 kcal |
| Total Carbohydrates | 19g |
| Dietary Fiber | 2g |
| Total Sugars | 6g |
| Protein | 3g |
| Total Fat | 4g |
| Saturated Fat | 2.5g |
| Sodium | 120mg |
| Cholesterol | 10mg |
| Vitamin C | 10% DV |
| Potassium | 243mg |
The Best Corn on the Cob Recipe
This corn on the cob recipe boiled with milk and butter is the kind of technique you will turn to every single summer and eventually pass down. Three ingredients, 13 minutes, and the result is corn so rich and sweet that butter on the side becomes optional.
Try it once and the milk-and-butter method becomes your new default. That first golden, tender bite, barely seasoned, almost sweet on its own, is all the convincing you will ever need.
Follow me on PINTEREST for all of my latest blog posts, videos, and recipes.
FAQs
What is the best method for cooking corn on the cob?
Boiling corn in water with a cup of milk and a full stick of butter is the best method for cooking corn on the cob. This technique infuses the kernels with fat-carried flavor that plain water cannot replicate, producing corn that is naturally rich, sweet, and tender without needing heavy condiments at the table. The milk-and-butter boil consistently outperforms steaming, grilling, and oven-roasting in terms of depth of flavor for everyday cooking.
How long should you boil your corn on the cob?
Fresh corn on the cob needs 6 to 8 minutes at a gentle simmer after you add it to the milk-and-butter cooking liquid. The exact time depends on the size of the ears and the freshness of the corn, peak-season ears picked that day often need only 6 minutes, while larger or slightly older ears may need the full 8. Test readiness by pressing a kernel with a paring knife: it should yield easily and release a small amount of milky liquid.
Can diabetics eat fresh corn on the cob?
Yes, diabetics can eat fresh corn on the cob in moderate portions. One medium ear of corn contains approximately 19 grams of carbohydrates and 2 grams of dietary fiber, which gives it a moderate glycemic index of around 52. The fiber slows the digestion of the natural sugars, making whole corn a better choice than processed corn products. Most diabetes nutrition guidelines from sources like the American Diabetes Association consider one small to medium ear of corn a reasonable portion within a balanced meal. Always consult a registered dietitian for personalized guidance.
How do you make Mexican corn on the cob (elotes)?
Start by cooking the corn using the milk-and-butter boil method described in this recipe, then pat the ears dry before adding toppings. Spread a thin layer of mayonnaise or crema over the entire surface of each ear, then roll it in a shallow dish of crumbled Cotija cheese. Dust generously with chili powder or a blend of smoked paprika and cayenne, then finish with a squeeze of fresh lime juice. Mexican corn on the cob prepared this way is one of the most popular street food preparations in Mexico and works as a side dish or appetizer at any gathering.
Can I make this corn on the cob recipe in an air fryer?
A corn on the cob recipe air fryer version works well when you want a lightly roasted, caramelized result rather than the tender, buttery texture of the boiled method. Brush husked ears with melted butter and cook at 400°F (200°C) for 10 to 12 minutes, turning halfway through. The air fryer cannot replicate the milk-infusion effect of the stovetop method, but it produces corn with a pleasantly roasted edge and concentrated sweetness that many people prefer for certain occasions. For the richest flavor, the stovetop milk-and-butter method remains the stronger choice.
Can I prepare this corn on the cob recipe with milk ahead of time?
Corn on the cob is best cooked and served immediately, but you can prep the ears up to 24 hours ahead by husking, de-silking, and storing them in the refrigerator wrapped in a damp paper towel. The cooking liquid itself should be made fresh, it only takes a few extra minutes to bring the water to a boil. If the corn finishes before the rest of the meal is ready, leave it in the hot cooking liquid with the heat turned off; it will stay warm and moist for up to 15 minutes without overcooking.
Where can I find fresh corn on the cob near me?
Fresh sweet corn on the cob is typically available at farmers markets, roadside farm stands, and most grocery stores from late June through early September in the Northern Hemisphere. For the freshest corn near you, check local farmers market directories or community agricultural boards in your area. Corn picked and cooked within 24 hours has notably superior flavor because the sugars have not yet begun converting to starch, this is the primary reason why corn on the cob near you at a local farm stand will almost always taste better than supermarket corn that traveled days from the field.